- Description
- Porcelain Batch & Colour Consistency Information
- Specifications
- How To Lay Your Paving
- How To Look After Your Paving
- Delivery
- Ask Our Experts
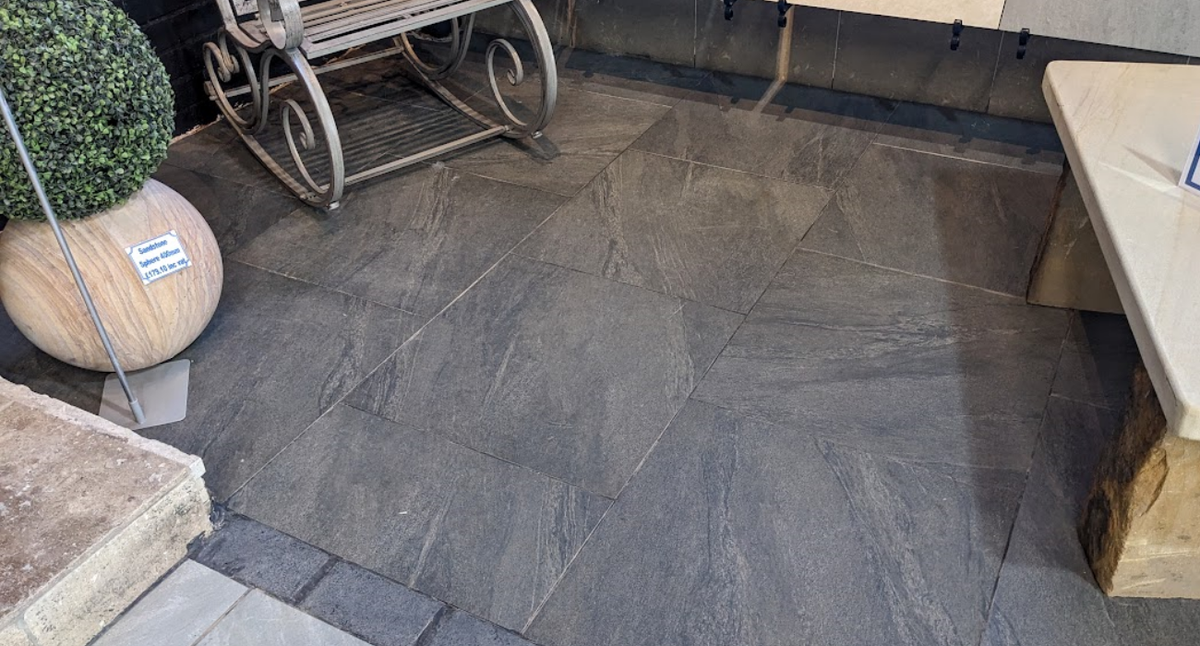
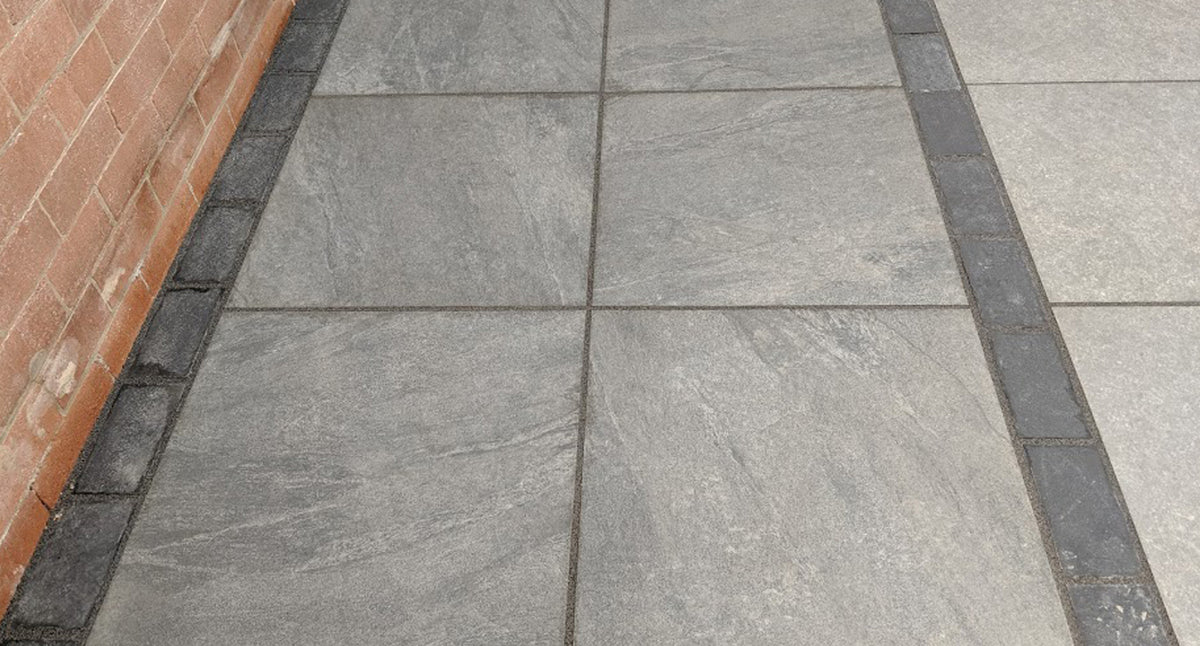
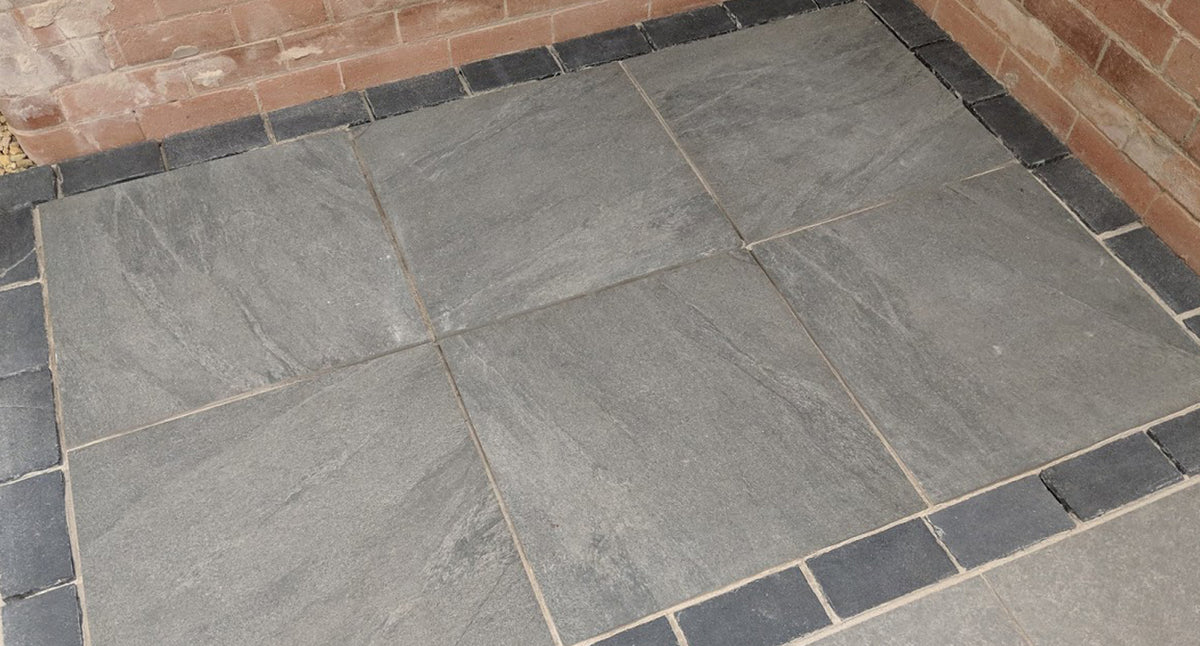
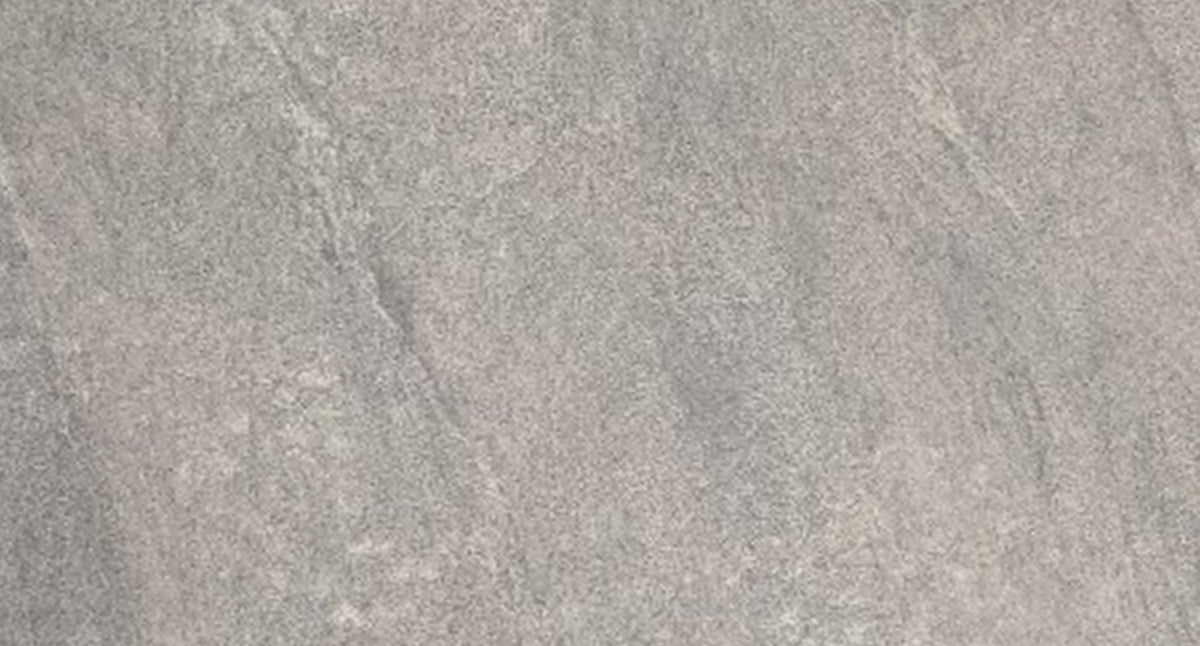
Striking Dark Grey Porcelain with a Subtle Stone-Inspired Pattern
If you’re looking to create a sleek, modern outdoor space with a bit of edge, Shadow Slate Porcelain Paving delivers with confidence. Featuring deep anthracite tones and a natural-looking striated pattern, this premium porcelain tile mimics the layered texture of real slate, while offering all the benefits of low-maintenance porcelain.
Its dark, sophisticated colouring makes it perfect for contemporary garden designs, modern courtyards, and patios where contrast is key. Pair it with light-coloured walling, soft landscaping, or timber features to create a space with real visual depth and impact.
With excellent slip resistance, high durability, and virtually no porosity, Shadow Slate is as practical as it is beautiful—whether you’re designing for the outdoors or carrying it through into interior spaces.
Why Choose Shadow Slate Porcelain?
✔ Deep Anthracite Grey Colouring – Adds bold contrast and a clean, modern finish.
✔ Stone-Inspired Surface Pattern – Striated design mimics the look of natural slate.
✔ Low Maintenance – Resistant to algae, stains, water absorption and frost.
✔ Slip-Resistant Texture – Safe underfoot, even in wet conditions.
✔ Durable & Hardwearing – Built for daily use in high-traffic areas.
✔ 900x600mm Size Format – Clean lines, perfect for contemporary layouts.
✔ Suitable for Indoor & Outdoor Use – Create seamless transitions between spaces.
A Contemporary Porcelain Choice for Bold, Stylish Spaces
Whether you’re designing a dramatic dining terrace, a crisp modern courtyard, or an indoor-outdoor flow, Shadow Slate Porcelain brings depth, drama, and practicality to your space — with virtually no upkeep required.
In Stock & Available for Immediate Delivery | Trade Discounts Available
Porcelain Batching & Colour Consistency
Porcelain paving is manufactured in batches, and while each batch maintains a high level of consistency, there can be slight variations in colour, surface texture and tone from one production run to another. These variations are entirely normal and are a natural result of the manufacturing process.
To ensure the best possible finish and colour match across your project, we strongly recommend ordering all the porcelain you need for your project in one order. This helps to ensure that your tiles come from the same batch and will maintain visual consistency throughout your space.
If you’re unsure about quantities, or if there’s a chance you may need additional stock later, we’re happy to help you calculate exactly what you need. We also recommend keeping a record of the batch code found on the packaging, in case matching stock is required in future.
If you have any questions or concerns about batching, just get in touch with our team – we’re here to help.
Technical Specifications
For full details on stone type, origin, sizes, weight, coverage, and pack contents, please refer to the technical specification table below. This information ensures you have everything you need to plan your project accurately.
|
Sizes Available
|
900mm x 600mm (40 tiles per full pack) - 21.6m2 coverage
|
|
Calibration (Thickness):
|
20mm
|
|
Colours:
|
Dark grey porcelain tile with a pattern of different shades of grey
|
|
Packaging:
|
Wooden pallets, Cardboard wrapping
|
|
Material Type:
|
Porcelain
|
|
Origin:
|
India
|
|
Edge Profile:
|
Square
|
|
Surface Finish:
|
Natural
|
|
Suitable for:
|
Patios, Terraces and other Pedestrian Areas
|
|
Application:
|
External
|
|
Slip Resistance:
|
R11
|
|
Sold by:
|
Individually or by Full Pack
|
|
Weight per flag (approx):
|
900mm x 600mm - 25 kg
|
|
Availability:
|
In stock - Please contact us to check for larger quantities
|
Step-by-Step Guide to Laying a Patio
Porcelain paving is durable, low-maintenance, and stylish, but laying it correctly is essential for a long-lasting and professional finish. Follow this step-by-step guide to ensure a secure, level, and visually stunning installation.
Step 1: Gather Your Tools & Materials
✔ Porcelain Paving Slabs – Ensure you have the correct sizes and quantities.
✔ Sub-Base Material – MOT Type 1 or compacted hardcore for stability.
✔ Priming Slurry – Essential for strong adhesion between the porcelain and mortar bed.
✔ Full Mortar Bed – A mix of sharp sand and cement (4:1 ratio).
✔ Tile Spacers – To maintain consistent joint widths (3-5mm recommended).
✔ Notched Trowel & Rubber Mallet – For precise levelling.
✔ Spirit Level & String Line – To maintain even paving levels.
✔ Jointing Compound – A high-quality exterior grout for porcelain paving.
Step 2: Prepare the Base
1️⃣ Excavate the Area – Dig down at least 150-200mm below the final surface level to allow space for the sub-base, mortar, and paving.
2️⃣ Lay the Sub-Base – Fill the area with 100-150mm of MOT Type 1 hardcore, compacting it in 50mm layers using a vibrating plate compactor.
3️⃣ Ensure a Solid Foundation – The sub-base should be firm, level, and well-compacted to prevent sinking or shifting over time.
Step 3: Apply a Priming Slurry to the Paving Slabs
Porcelain paving is non-porous, meaning it won’t naturally bond to the mortar like sandstone or limestone. Applying a priming slurry creates a strong bond between the porcelain and the mortar bed.
✔ Mix the Priming Slurry – Follow the manufacturer’s instructions for a thick, paint-like consistency.
✔ Apply to the Back of Each Slab – Use a brush or roller to coat the entire underside before laying.
Tip: Don’t let the priming slurry dry before placing the slab onto the mortar!
Step 4: Lay the Paving on a Full Mortar Bed
1️⃣ Mix the Mortar Bed – Combine sharp sand and cement at a 4:1 ratio, adding water until it forms a firm but workable consistency.
2️⃣ Lay a Full Bed – Spread the mortar at least 30mm thick over the prepared base.
3️⃣ Position the Paving Slabs – Carefully place each slab onto the mortar bed, gently tapping with a rubber mallet to level.
4️⃣ Maintain Consistent Joints – Use 3-5mm tile spacers between slabs for a uniform, professional finish.
5️⃣ Check Levels – Use a spirit level and string line to ensure even surfaces with a gentle fall (1:60 gradient) for drainage.
Step 5: Allow the Mortar to Set
✔ Leave the paving undisturbed for at least 24-48 hours, avoiding foot traffic to allow the mortar to fully cure.
✔ Check for any slight movements or misalignment and adjust before the mortar sets completely.
Step 6: Jointing & Sealing (If Required)
Once the paving is firmly set, it’s time to fill the joints and ensure a clean, weatherproof finish.
1️⃣ Choose the Right Jointing Compound – Use a porcelain-compatible grout or brush-in jointing compound.
2️⃣ Apply the Grout – Work in small sections, using a grout float or brush to press the grout into the joints.
3️⃣ Clean Off Excess Grout – Wipe off residue immediately with a damp sponge or cloth before it dries.
4️⃣ Final Rinse – Once fully cured, rinse the paving with clean water.
Optional: Porcelain paving is low-maintenance and doesn’t require sealing, but for added protection, you may apply a porcelain sealer to prevent long-term staining.
Final Tips for a Perfect Porcelain Paving Installation
✔ Plan Your Layout First – Dry-lay the slabs before installation to ensure the best visual arrangement.
✔ Ensure Proper Drainage – A slight gradient will prevent water pooling.
✔ Work Efficiently – Once mortar is spread, lay the slab immediately to ensure strong adhesion.
✔ Keep the Surface Clean – Regularly wipe off grout residue and mortar splashes during installation to avoid stains.
By following this step-by-step guide, you’ll achieve a flawless porcelain paving installation that’s not only stunning but also durable, long-lasting, and easy to maintain.
Need more advice? Contact us for expert guidance on choosing and installing premium porcelain paving.
How to Clean & Maintain Indian Sandstone
Routine Cleaning – Keeping Your Porcelain Paving Looking Fresh
Step 1: Sweep Away Dirt & Debris
✔ Use a soft-bristle broom or brush to remove dirt, leaves, and loose debris regularly.
✔ If the area is dry, a leaf blower can help clear dust and small particles quickly.
Step 2: Wash with Warm Soapy Water
✔ Mix warm water with a pH-neutral cleaner or mild washing-up liquid.
✔ Use a soft mop or sponge to clean the surface—avoid abrasive materials that could scratch the finish.
✔ Rinse thoroughly with clean water to prevent residue build up.
Step 3: For Deeper Cleans, Use a Pressure Washer (Carefully!)
✔ Use a medium pressure setting and keep the nozzle at least 30cm away from the surface.
✔ Avoid using high pressure on jointing compounds, as it may weaken the grout between slabs.
Tip: Unlike natural stone, porcelain paving is non-porous, meaning it won’t absorb water or stains, making deep cleaning much easier!
Removing Stubborn Stains from Porcelain Paving
Porcelain paving is highly stain-resistant, but some stubborn marks may still require extra care.
🛑 Avoid acidic or bleach-based cleaners, as they can damage the surface.
| Type of Stain |
Cleaning Method |
| Mud & Soil |
Allow to dry, then sweep away. Wash with warm soapy water. |
| Grease & Oil |
Use a porcelain-friendly degreaser or diluted dish soap, then rinse thoroughly. |
| Moss & Algae |
Apply a specialist algae remover or diluted biocide, leave for a few minutes, then rinse. |
| Rust Marks |
Use a rust remover formulated for porcelain—avoid DIY acidic solutions. |
| Food & Drink Spills |
Clean immediately with warm soapy water to prevent any residue. |
Tip: Always test any new cleaner on a small area first to check compatibility with your paving.
Seasonal & Long-Term Porcelain Paving Care
Spring & Summer – Keeping It Looking Perfect
✔ Regularly sweep and wash to keep dust and pollen from settling.
✔ Check for weeds between joints (although porcelain paving with proper jointing has minimal weed growth!).
Autumn – Preparing for Colder Weather
✔ Remove fallen leaves to prevent organic stains.
✔ Give the surface a final wash before winter to remove dirt that could become slippery in damp conditions.
Winter – Preventing Ice & Slips
✔ Avoid using rock salt, as it can leave residue—opt for grit or sand instead.
✔ If needed, use warm water and a mild cleaner to remove frost build up.
Do I Need to Seal Porcelain Paving?
No! One of the biggest advantages of porcelain paving is that it doesn’t require sealing. Unlike natural stone, which is porous and needs protection, porcelain tiles are non-absorbent, meaning:
✔ No risk of staining from spills.
✔ No water absorption leading to frost damage.
✔ Minimal maintenance compared to sandstone, limestone, or concrete paving.
However, if you’re using grout between the slabs, some people choose to seal the grout to reduce the risk of dirt build up over time.
Final Tips for Long-Lasting Porcelain Paving
✔ Clean regularly to keep the surface free from dirt and debris.
✔ Avoid harsh chemicals like bleach or acidic cleaners.
✔ Use the right tools – soft brushes, mops, and non-abrasive cleaners are best.
✔ Rinse thoroughly after cleaning to prevent streaks and residue.
By following these simple maintenance steps, your porcelain paving will stay looking as fresh and stunning as the day it was laid.
Have questions? Contact our team for expert advice on caring for your porcelain paving.
Need Help? We're Here to Assist!
Choosing the perfect paving or stone products for your garden project is an important decision, and we're here to help! Whether you’d like advice on colours, sizes, installation, or suitability, our expert team is ready to assist.
💬 Chat with us online for quick answers
📞 Call us for expert guidance - 01282 860571
📧 Email us with your project details - hello@stonepaving.co.uk
No question is too big or small—get in touch and let us help you make the right choice for your outdoor space!